
Introduction
Brining is a simple yet transformative technique that involves soaking chicken in a saltwater solution to enhance its flavor and moisture. It works by helping the chicken absorb liquid and seasoning, ensuring every bite is juicy and delicious. A well-prepared chicken brine recipe can make all the difference, offering a foolproof way to elevate your meals with minimal effort. Whether you’re roasting, grilling, or frying, this easy method guarantees perfectly tender chicken every time.
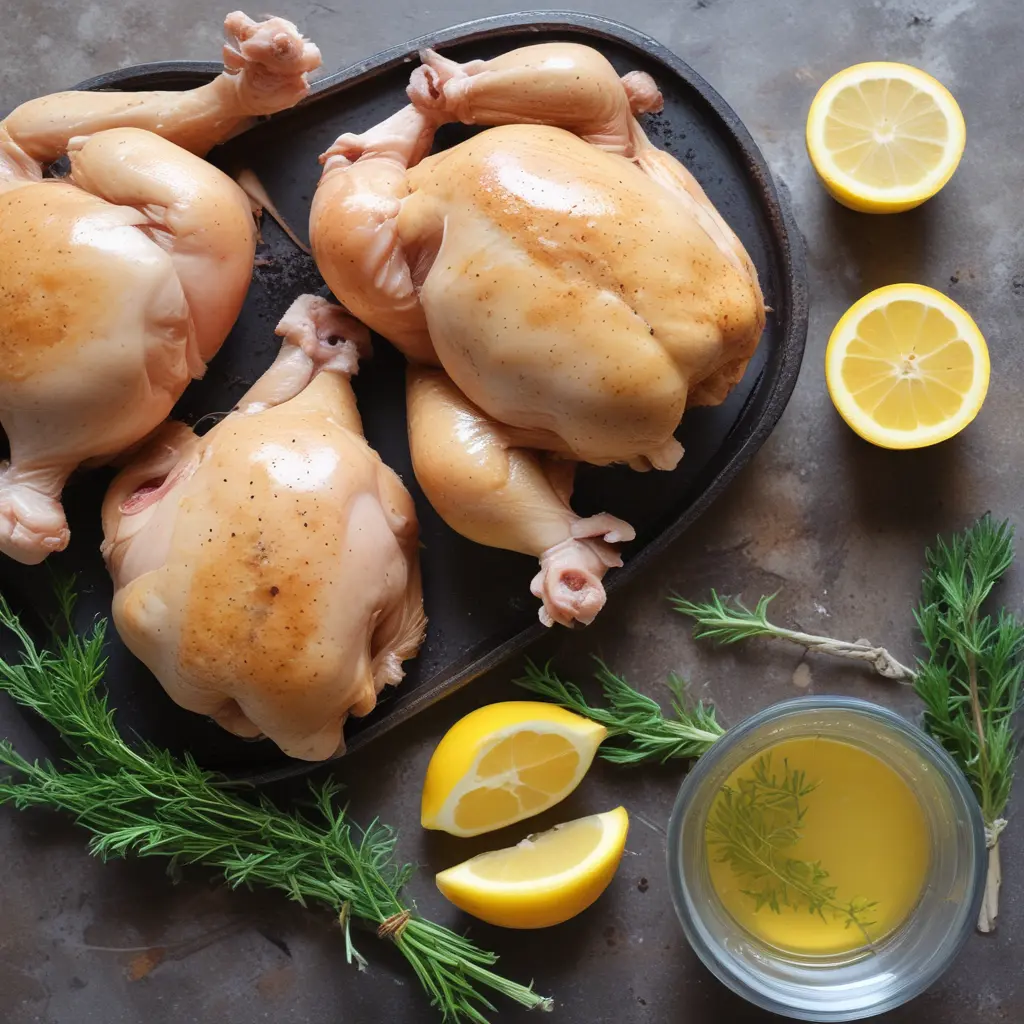
Ingredients for the Perfect Chicken Brine Recipe
Ingredients for the Perfect Chicken Brine
To make a flavorful chicken brine, you’ll need these simple ingredients:
- Water: The base of the brine, essential for dissolving the salt and infusing the chicken.
- Salt: Use kosher salt or table salt to create the brine solution. Kosher salt is preferred for its milder flavor.
- Sugar (optional): Adds a touch of sweetness and balances the saltiness, enhancing the chicken’s flavor.
- Optional spices and aromatics: Add ingredients like peppercorns, bay leaves, garlic, or fresh herbs (e.g., rosemary or thyme) for extra flavor.
These ingredients work together to make your chicken juicy, tender, and full of flavor.
Flexibility of Adding Flavor Variations Based on Personal Preference
One of the best things about brining is how easy it is to customize. While the basic brine requires water, salt, and sugar, you can add different spices or herbs to create a flavor profile that suits your taste.
You can try adding garlic, peppercorns, or even citrus zest for a fresh, zesty flavor. For a more savory brine, add herbs like rosemary or thyme. If you prefer a sweeter taste, try adding honey or brown sugar.
Brining is all about experimenting and finding what works best for your favorite dishes!
Step-by-Step Guide to Brining Chicken
Step 1: Prepare the Brine Solution
Start by dissolving the salt and sugar in water. Stir until fully dissolved to create a balanced brine solution that will infuse your chicken with flavor.
Step 2: Add Aromatics for Flavor Enhancement
For extra flavor, add aromatics like bay leaves, peppercorns, garlic, or fresh herbs. These ingredients will infuse the chicken with subtle, delicious flavors during the brining process.
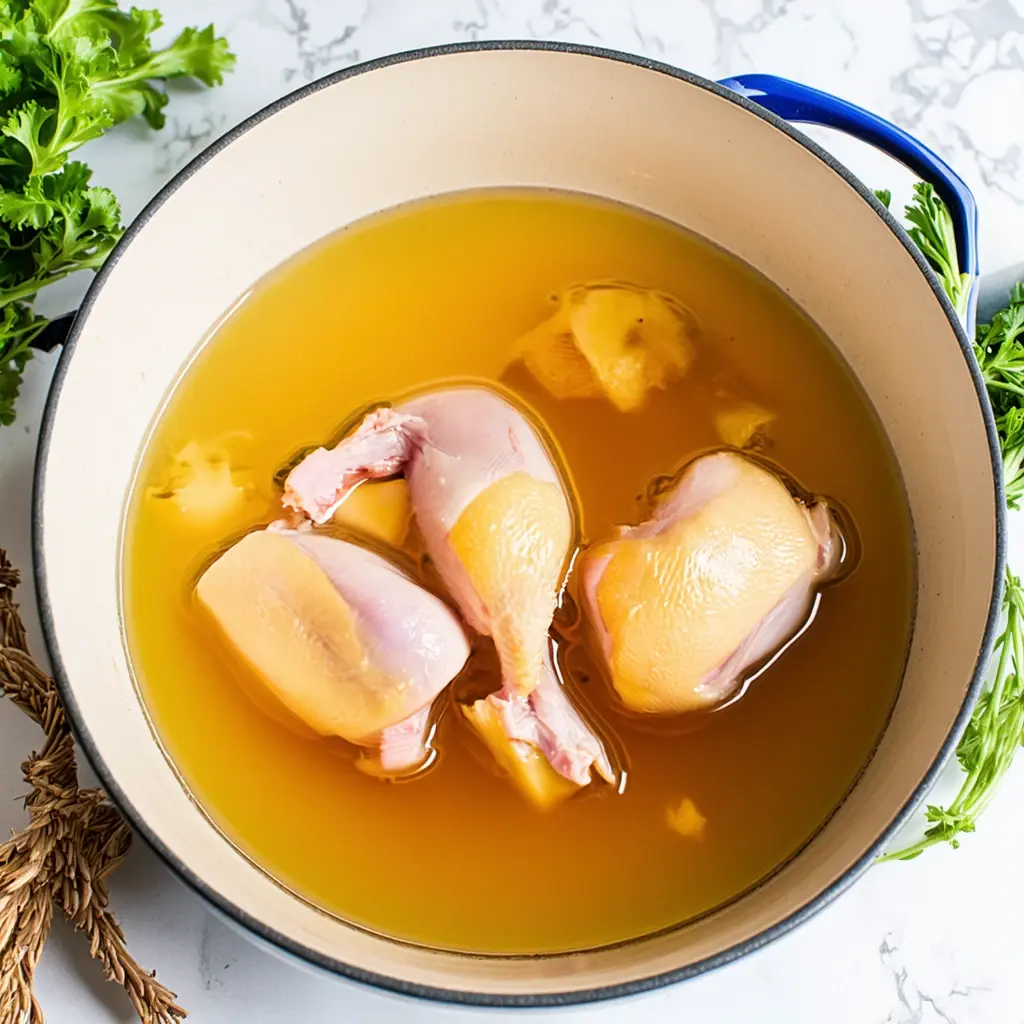
Step 3: Submerge the Chicken Fully in the Brine
Place your chicken into the brine, ensuring it’s fully submerged. If needed, weigh it down to keep it immersed. Refrigerate the chicken while it brines to maintain food safety.
Step 4: Recommended Brining Times
The brining time will vary depending on the chicken cut:
- Whole Chicken: Brine for 8–12 hours.
- Chicken Breasts: Brine for 1–2 hours.
- Chicken Thighs: Brine for 2–4 hours.
Adjust the time based on your preferred flavor intensity!
Tips for Perfectly Brined Chicken Every Time
Use the Right Ratio of Salt to Water for the Brine Solution
To create the perfect brine, it’s important to use the right salt-to-water ratio. A good rule of thumb is to use 1/4 cup of salt for every quart (4 cups) of water. This balance ensures that the chicken absorbs enough seasoning without becoming too salty.
If you’re using kosher salt, it’s recommended because of its texture and ease of dissolving. Adjust the amount of salt depending on the size of the chicken or your flavor preference, but keep the ratio consistent for the best results.
Ensure the Chicken is Fully Submerged in the Brine
For an even brine, it’s crucial that the chicken is fully submerged. If the chicken isn’t completely covered, some parts may not absorb enough salt and moisture, leading to uneven flavor and texture. To ensure it stays submerged, you can use a plate or a bowl to weigh the chicken down. If necessary, use a large enough container to allow the brine to fully cover the chicken, ensuring every piece gets seasoned properly.
Always Refrigerate the Chicken While Brining for Food Safety
To keep the chicken safe during the brining process, always refrigerate it. Brining at room temperature can cause harmful bacteria to grow, which is dangerous. By refrigerating the chicken, you ensure that it stays at a safe temperature, preventing any foodborne illnesses while the chicken absorbs the brine.
Rinse the Chicken After Brining to Remove Excess Salt Before Cooking
Once the brining process is complete, rinse the chicken under cold water to remove any excess salt. This step helps prevent the chicken from becoming too salty when cooked. It also ensures that the flavor is balanced, leaving you with juicy and well-seasoned chicken.
Common Questions About Brining Chicken
Can I Reuse the Brine?
No, for safety reasons, you should never reuse brine. After brining, the solution may contain bacteria or contaminants from the raw chicken, making it unsafe to reuse. Always discard the brine after use and prepare a fresh batch for each brining session.
What Type of Salt Should I Use?
The type of salt you use can affect the outcome of your brine. Kosher salt is often preferred because it has a coarser texture, dissolves easily, and provides a milder flavor. Table salt, on the other hand, is finer and more concentrated, so if using table salt, reduce the amount by half to avoid over-salting the chicken. Kosher salt is the best choice for an even brine.
Does Brining Affect the Cooking Time?
Yes, brining can slightly affect the cooking time. Because the chicken absorbs moisture from the brine, it may cook a little faster than unbrined chicken. This is because the added moisture helps retain heat and cook the chicken more evenly. However, the difference in cooking time is minimal, so it’s still important to check for doneness.
Can I Freeze Brined Chicken?
Yes, you can freeze brined chicken, but make sure to do so carefully. After brining, rinse the chicken well to remove excess salt and then pat it dry. Once dried, place the chicken in an airtight container or freezer bag before freezing. Freezing helps preserve the moisture and flavor for later use.